· Arduino · 3 min read
Using Multiple Environments in PlatformIO to Build for Different Boards
Learn how to configure a single PlatformIO project in Visual Studio Code to build and upload the same code to Arduino Uno, Nano, and Mega. This guide shows how to keep your code organized and easily switch between boards using the PlatformIO extension.
Introduction
When working on Arduino projects, you might need to support different boards like the Uno, Nano, and Mega. Instead of duplicating your code across separate projects, PlatformIO allows you to define multiple environments in a single project. This way, you can build, upload, and monitor your firmware for different boards from the same codebase.
In this guide, we’ll show how to set this up using Visual Studio Code with the PlatformIO extension, so you can build and upload to any supported board directly from your IDE.
Creating your project in VS Code
Start by opening Visual Studio Code and installing the PlatformIO IDE extension if you haven’t already done so. Then create a new project:
- Click on the PlatformIO Home icon in the VS Code sidebar.
- Choose New Project.
- Enter a project name.
- Select Arduino Uno as the board (we’ll add the others later).
- Choose Arduino as the framework.
- Click Finish.
PlatformIO will generate a standard project structure, including a src folder with a main.cpp file and a platformio.ini configuration file.
Configuring multiple environments
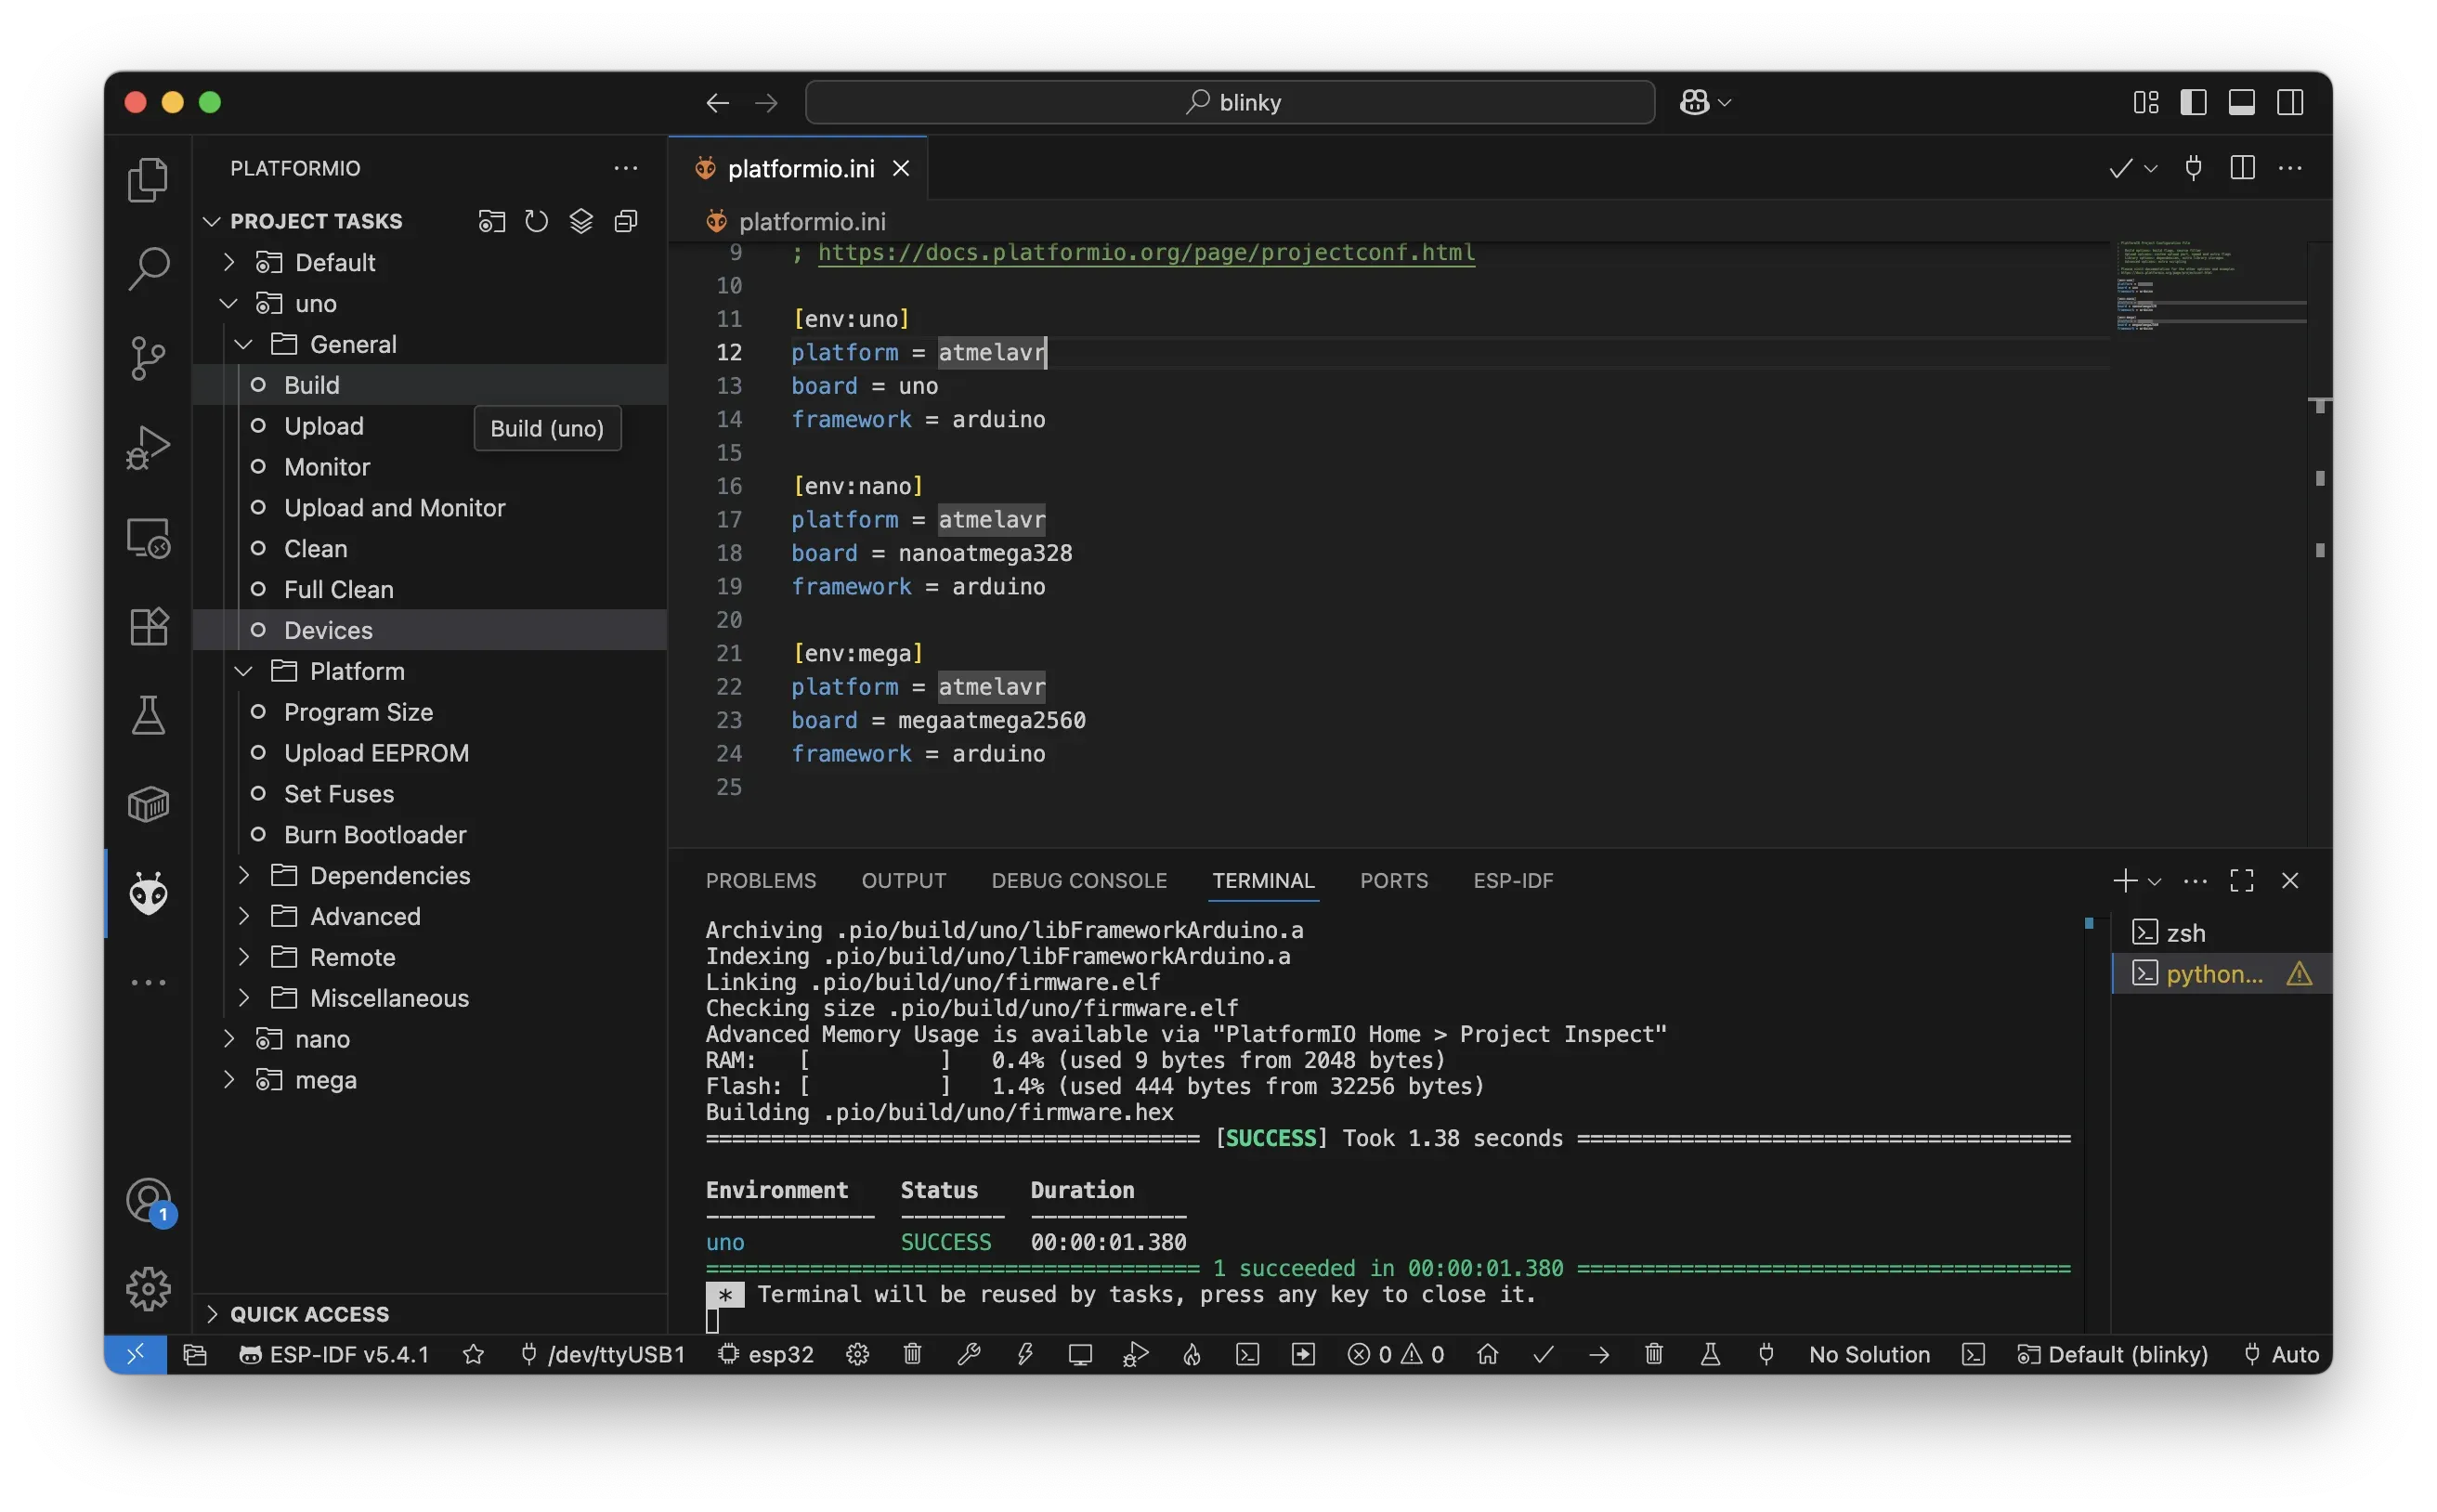
Open the platformio.ini file in the root of your project. By default, it only contains an environment for the Uno. To add the Nano and Mega, extend it like this:
[env:uno]
platform = atmelavr
board = uno
framework = arduino

[env:nano]
platform = atmelavr
board = nanoatmega328
framework = arduino

[env:mega]
platform = atmelavr
board = megaatmega2560
framework = arduino
Now your single project can target all three boards. All environments share the same code in src/main.cpp.
Building and uploading with the PlatformIO extension
You don’t need to use command-line commands for building or uploading. The PlatformIO extension provides everything you need inside Visual Studio Code:
- Open the PlatformIO Project Tasks panel in the VS Code sidebar.
- Under the Build section, you’ll see tasks like:
- Build → uno
- Build → nano
- Build → mega
Click on any of these to build your code for the selected board.
To upload your code:
- Expand the Upload section.
- Click on:
- Upload → uno
- Upload → nano
- Upload → mega
PlatformIO handles the rest, automatically selecting the right environment and compiling the code accordingly.
You can also use the Monitor tasks to open the serial monitor for each board.
Adding board-specific configurations
Sometimes, you may need different settings for each board. For instance, if the LED is wired to different pins, you can define build flags in each environment:
[env:uno]
platform = atmelavr
board = uno
framework = arduino
build_flags = -D LED_PIN=13

[env:nano]
platform = atmelavr
board = nanoatmega328
framework = arduino
build_flags = -D LED_PIN=12

[env:mega]
platform = atmelavr
board = megaatmega2560
framework = arduino
build_flags = -D LED_PIN=11
Then, in your main.cpp file, use the LED_PIN constant:
void setup() {
    pinMode(LED_PIN, OUTPUT);
}

void loop() {
    digitalWrite(LED_PIN, HIGH);
    delay(500);
    digitalWrite(LED_PIN, LOW);
    delay(500);
}
This way, the same code behaves differently depending on the board you build for.
Why this approach is useful
Defining multiple environments in PlatformIO helps you:
- Keep a single, clean codebase
- Avoid duplicating code across separate projects
- Quickly switch between boards from within VS Code
- Add or remove boards in the future without reorganizing your project
This is especially helpful if you work on libraries, prototypes, or products that must run on several hardware variants.
Conclusion
Using multiple environments in PlatformIO is one of the most practical ways to manage multi-board Arduino projects. The Visual Studio Code extension makes the process seamless, so you can build, upload, and test on different boards by simply choosing a task.
- arduino
- platformio
- vscode
- embedded
- multi-board