· Arduino · 4 min read
Writing Testable Code and Running Tests Before Flashing with PlatformIO’s Built-In Framework
PlatformIO isn’t just about flashing firmware to your Arduino or ESP32 board—it’s also a complete development ecosystem that supports writing unit tests, running them locally, and keeping your embedded projects robust and maintainable. In this post, we’ll explore how to write testable code and run tests using PlatformIO’s built-in testing framework, all before the code ever reaches your hardware.
Modern embedded development isn’t what it used to be. Gone are the days when you wrote code, flashed it, and hoped for the best while staring at a blinking LED. Today, tools like PlatformIO make it possible to bring professional software engineering practices—like unit testing—to even the simplest Arduino project.
Let’s see why this matters, how PlatformIO makes it surprisingly easy, and what your workflow can look like when you integrate testing into your embedded projects.
Why test your embedded code?
Embedded software often interacts with hardware directly, which leads some developers to think “testing isn’t practical.” But the reality is: a lot of your logic can and should be tested in isolation, long before it runs on real hardware.
Consider the benefits:
- Catch bugs before flashing, saving hours of re-flashing and debugging.
- Make changes confidently, knowing your tests will catch regressions.
- Design your code in a modular, maintainable way—because testable code tends to be better-structured.
Even if you can’t test everything (e.g., direct register manipulation or hardware timing), you can still cover most of your algorithms, data handling, state machines, and protocol parsing.
PlatformIO’s Unit Testing Framework
PlatformIO has testing built right in, thanks to its Unified Testing feature built around the Unity test framework (not to be confused with the game engine).
The process looks like this:
- Write your code so that logic can be tested separately from hardware.
- Place your tests in the
test/folder. - Run
Testdirectly in the PlatformIO VSCode extension - See detailed reports of passed and failed tests—without touching your hardware.
Let’s see what this looks like step by step.
Structuring your code to be testable
Suppose you have a simple Arduino project that calculates a checksum for data received over serial. Instead of writing everything in setup() and loop(), split your logic into functions or classes in separate files.
Example (lib/Checksum/Checksum.cpp):
#include "Checksum.h"

uint8_t Checksum::calculate(const uint8_t* data, size_t length) {
    uint8_t sum = 0;
    for (size_t i = 0; i < length; i++) {
        sum ^= data[i];
    }
    return sum;
}
And the header (lib/Checksum/Checksum.h):
#ifndef CHECKSUM_H
#define CHECKSUM_H

#include <Arduino.h>

class Checksum {
public:
    static uint8_t calculate(const uint8_t* data, size_t length);
};

#endif
By keeping your algorithm separate from setup() and loop(), it becomes testable outside the board.
Writing tests in PlatformIO
In your PlatformIO project, create a folder named test/. Inside, add a new folder for your test suite, like test/test_checksum/, and create a test_main.cpp file:
#include <Arduino.h>
#include <unity.h>
#include "Checksum.h"

void test_checksum_empty_data() {
    uint8_t data[] = {};
    TEST_ASSERT_EQUAL_UINT8(0, Checksum::calculate(data, 0));
}

void test_checksum_known_values() {
    uint8_t data[] = {0x01, 0x02, 0x03};
    TEST_ASSERT_EQUAL_UINT8(0x00, Checksum::calculate(data, 3));
}

void setup() {
    UNITY_BEGIN();
    RUN_TEST(test_checksum_empty_data);
    RUN_TEST(test_checksum_known_values);
    UNITY_END();
}

void loop() {
    // not used
}
The project structure looks like this
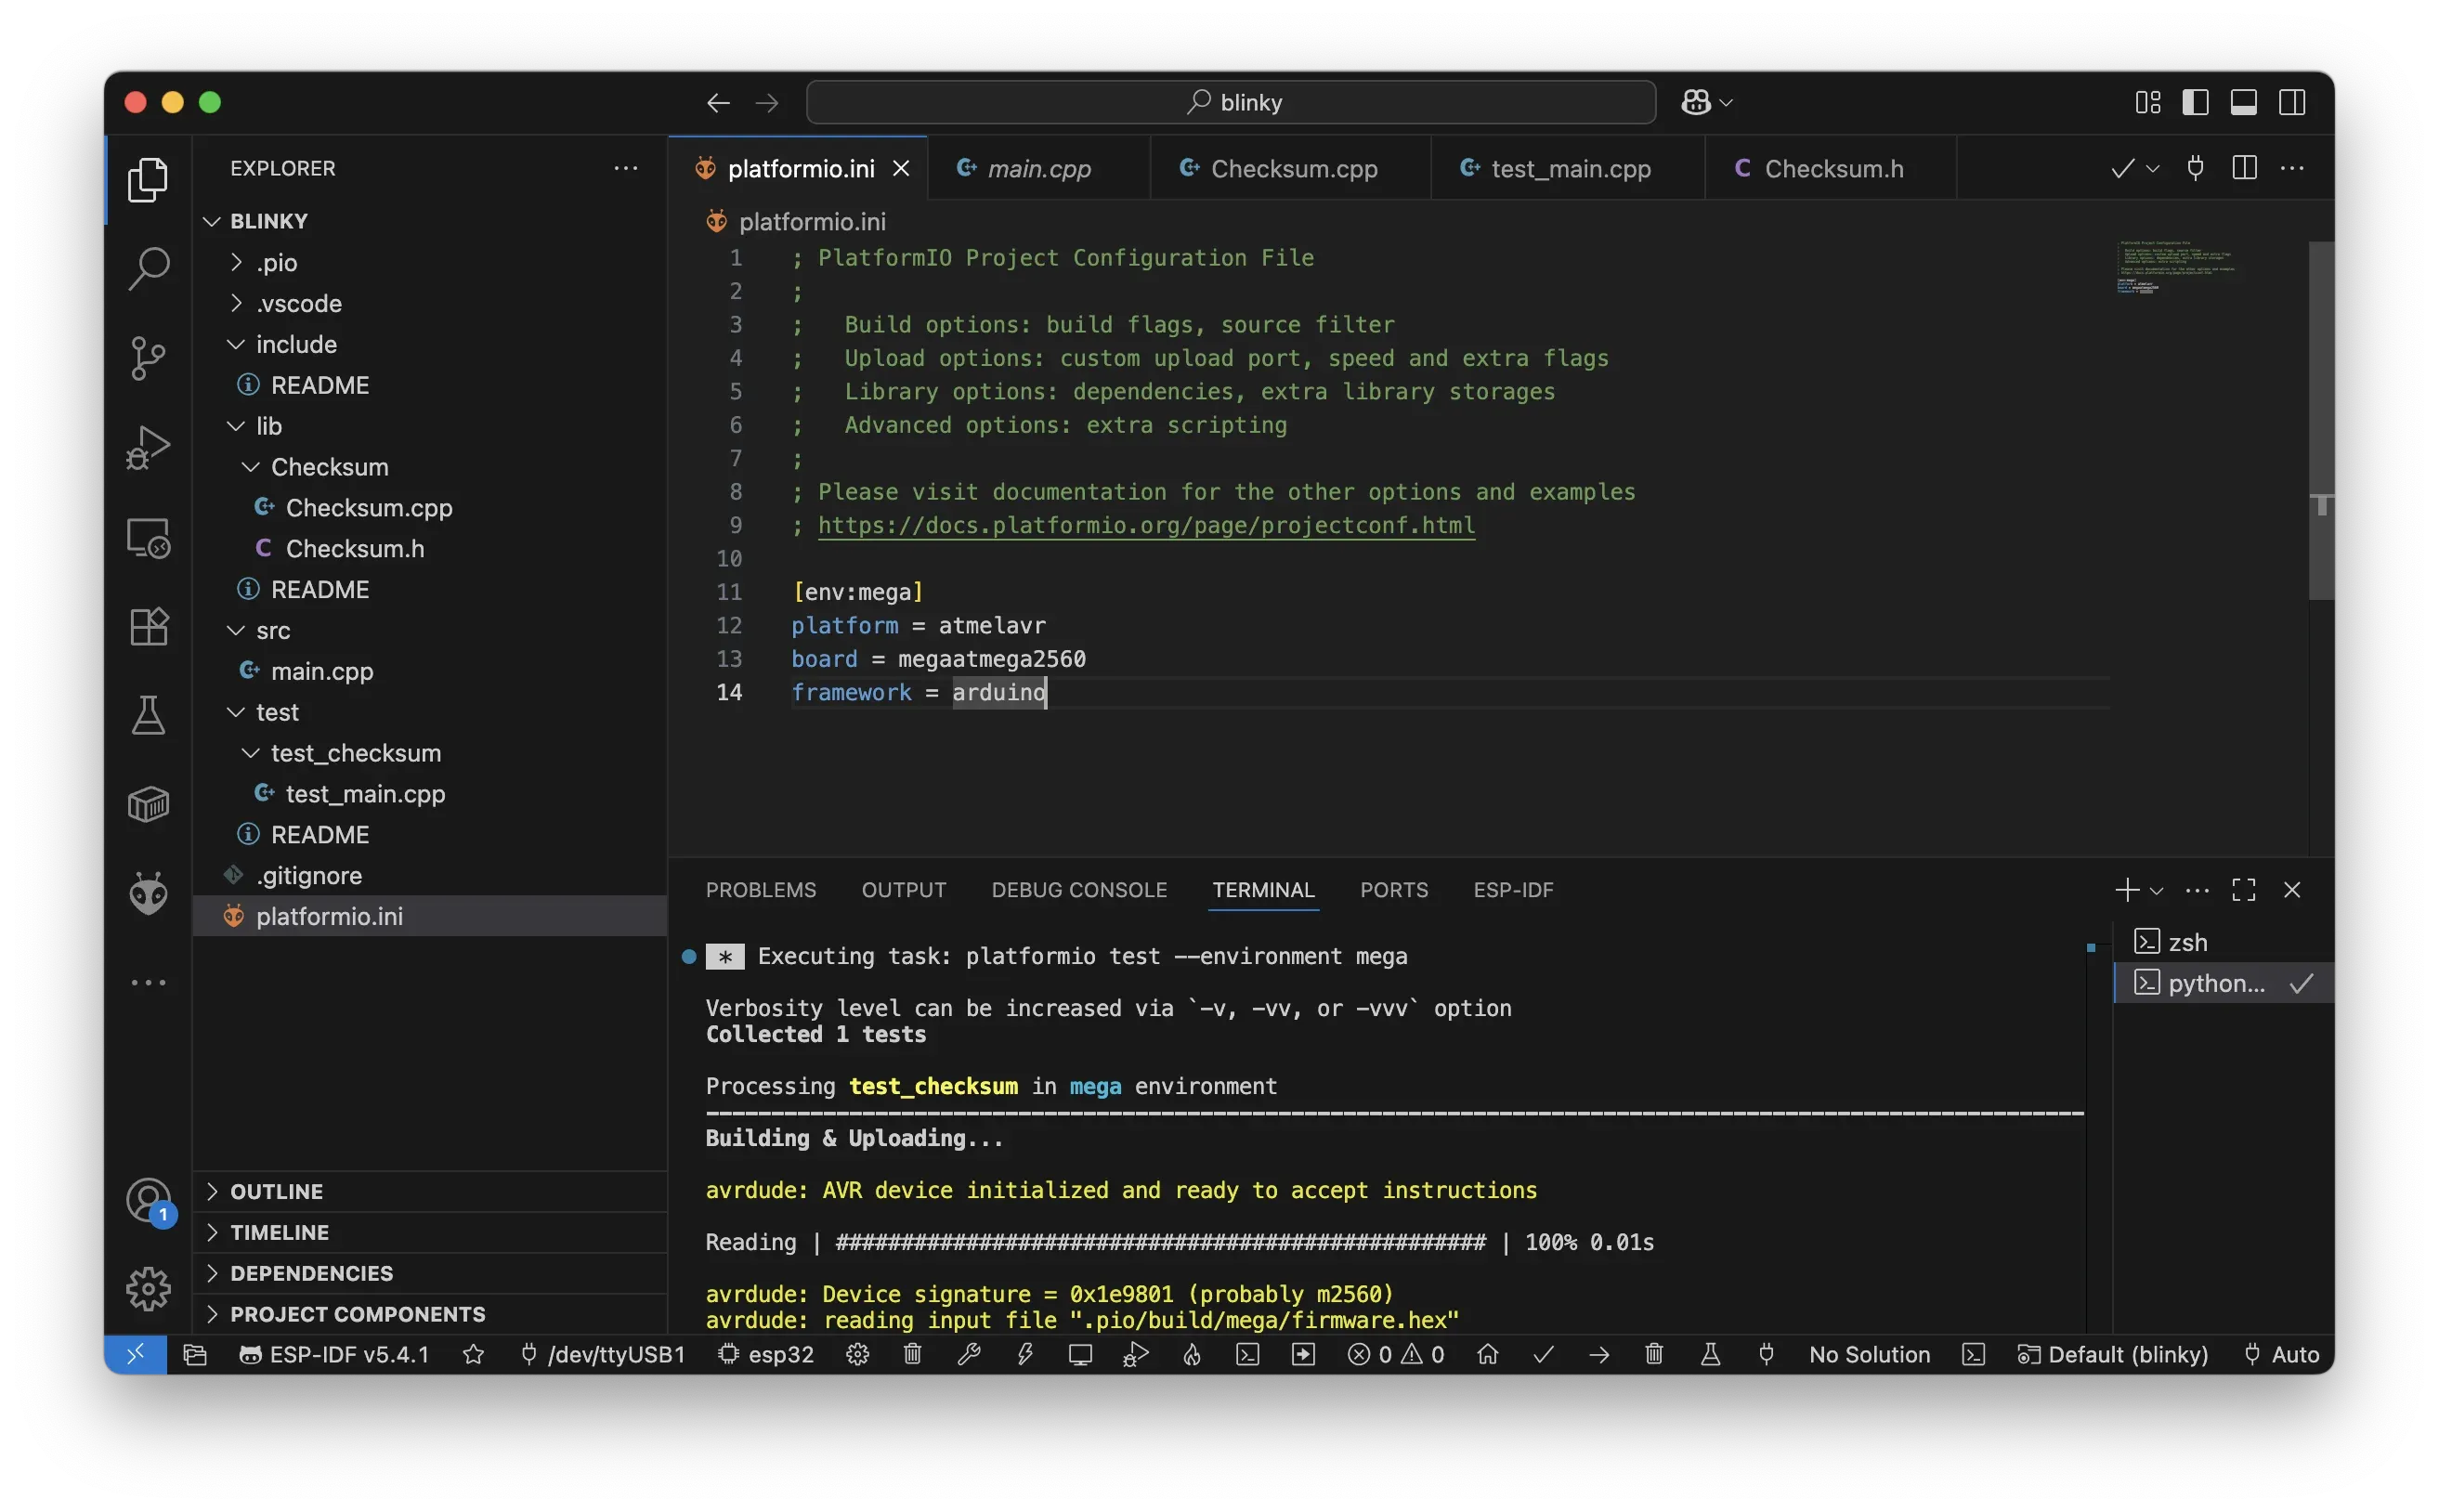
Running the tests
With the VSCode PlatformIO extension:
- Open the PlatformIO sidebar.
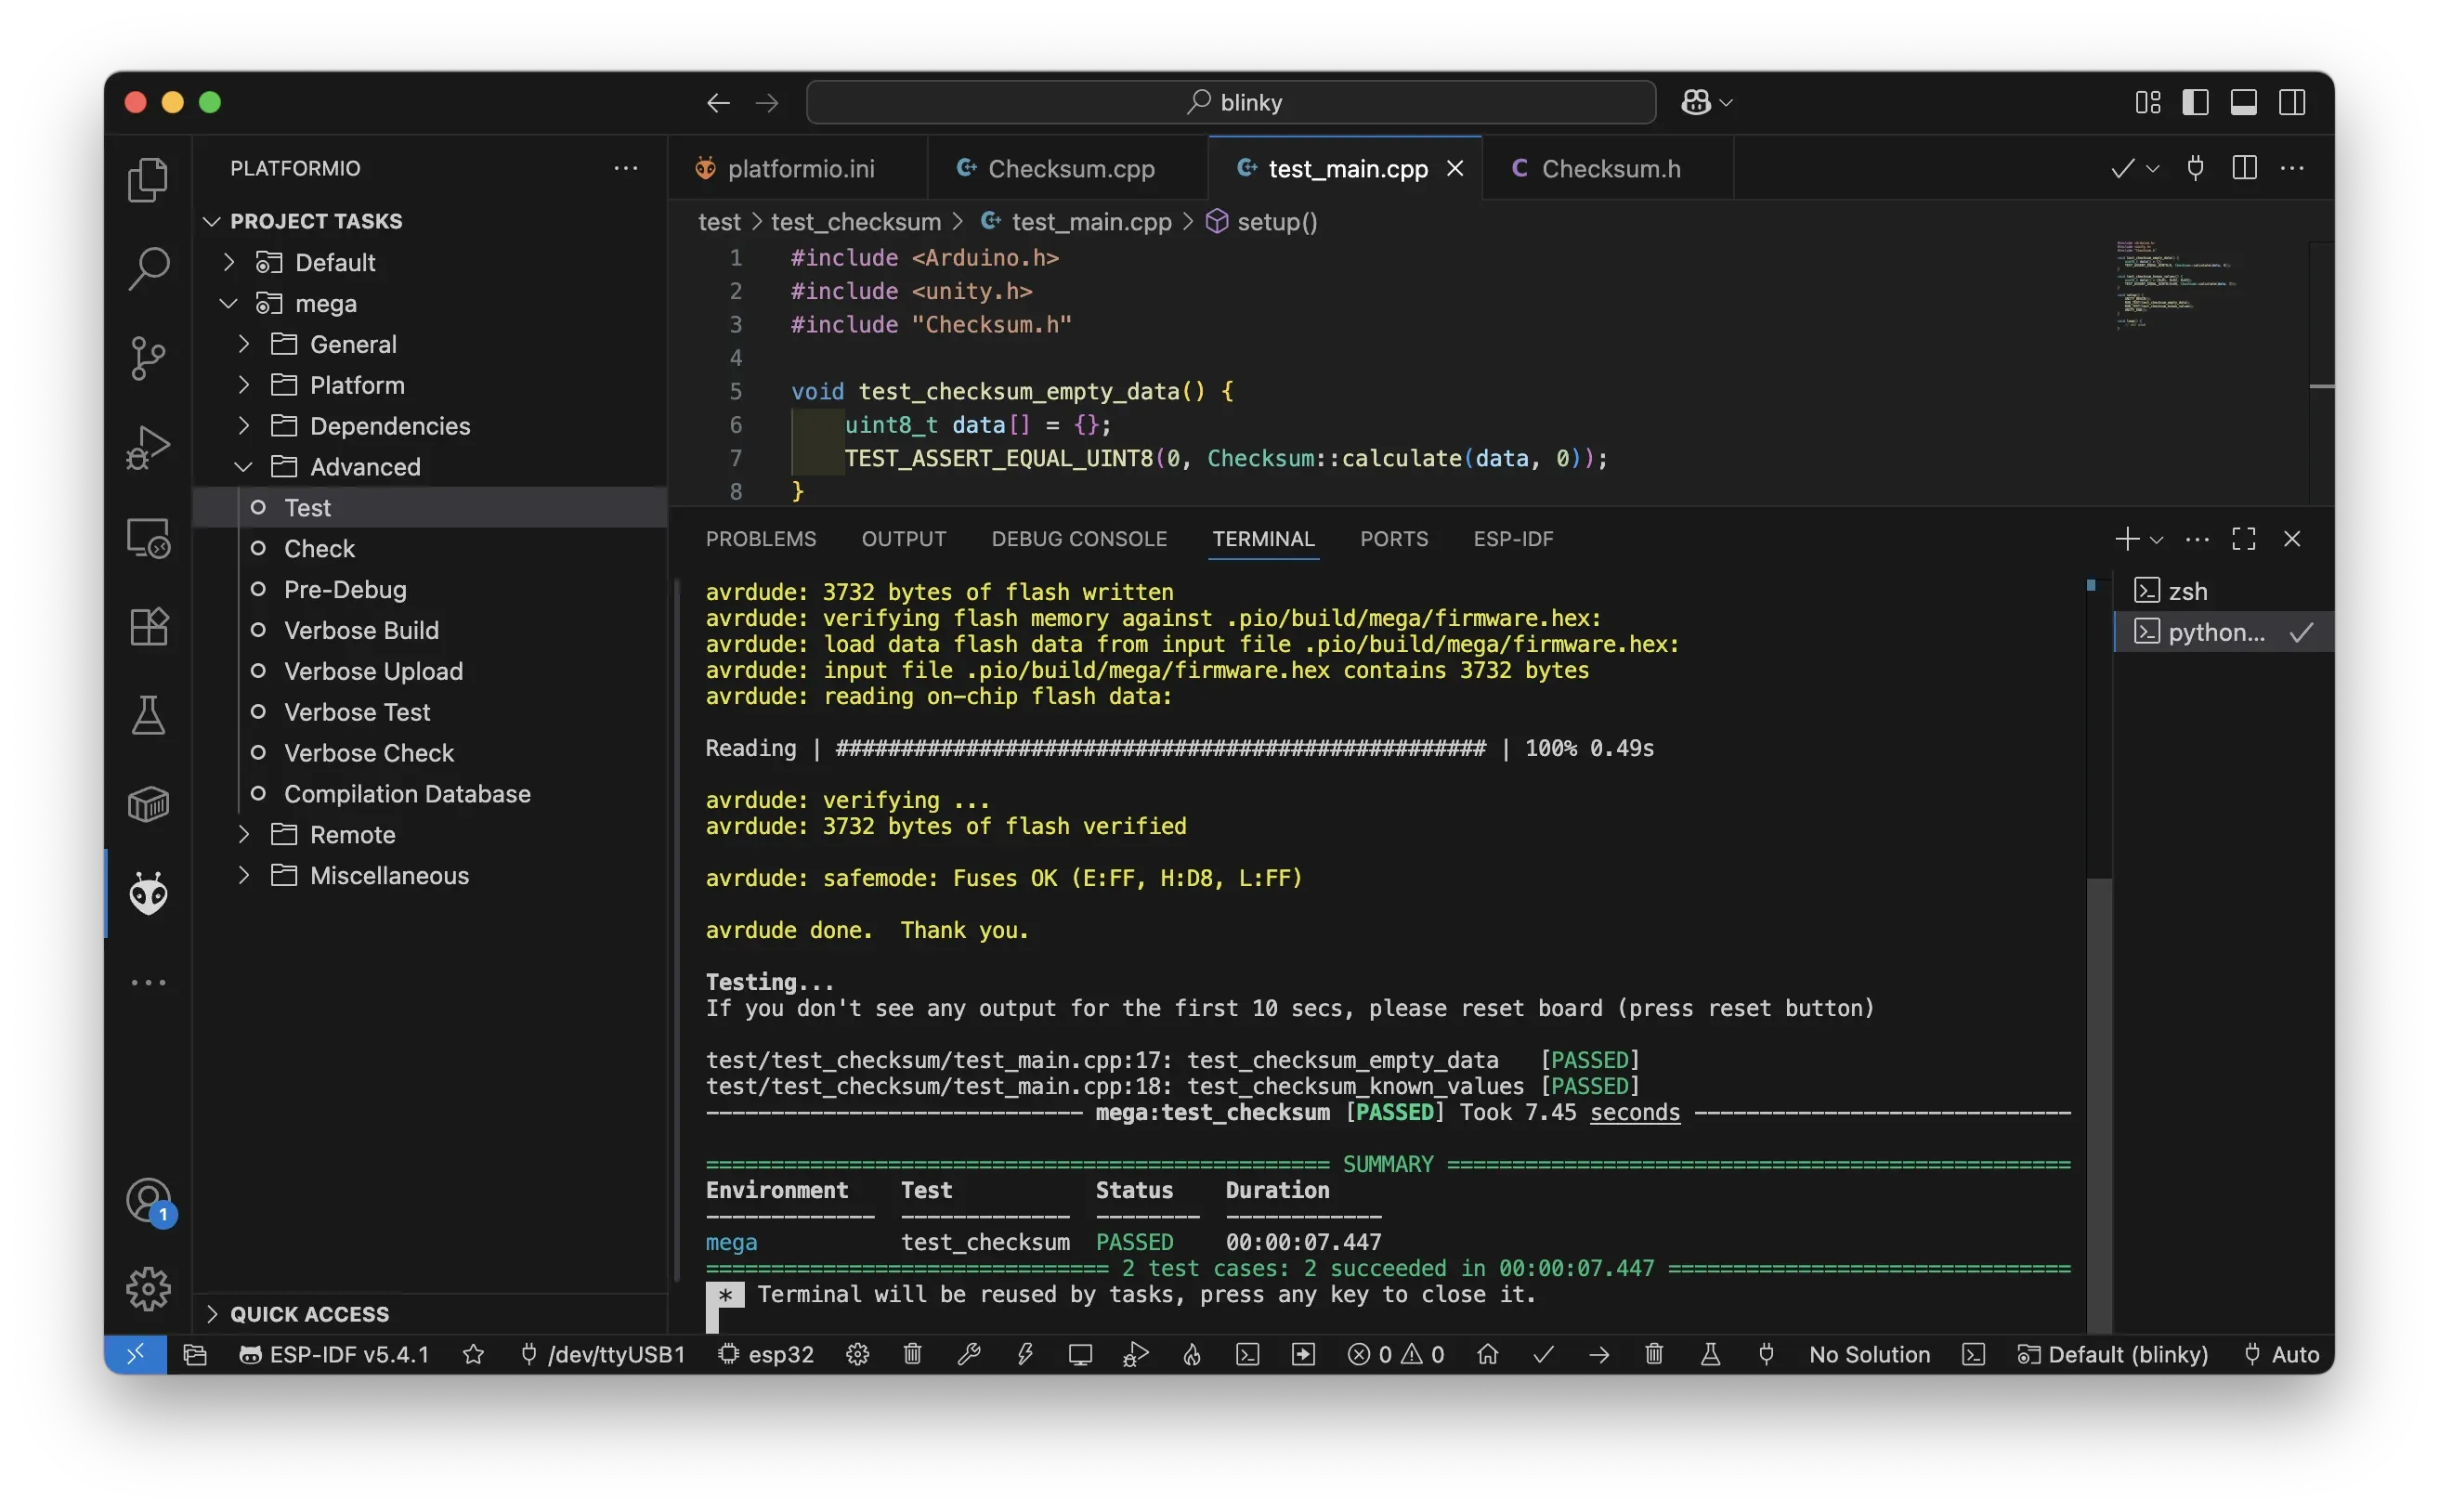
- Click the Project Task > Mega > Advanced > Test
PlatformIO will compile your test code and run it, either in a native environment (like your PC) or on a microcontroller if you configure it that way.
You’ll see output showing passed and failed tests, something like:
Testing on host vs. hardware
By default, PlatformIO can build your tests to run on the target board. But you can also run them locally on your computer (host testing) by adding an environment in platformio.ini using the native platform:
[env:native]
platform = native
This way, your logic can be tested instantly on your machine—great for pure algorithmic code that doesn’t depend on hardware.
Best practices for embedded testing
- Separate logic from hardware: Put pure functions, algorithms, and data handling in libraries.
- Mock hardware interactions: If you need to test code that calls
digitalWrite()or reads a sensor, consider writing an abstraction layer you can mock. - Test incrementally: Even simple state machines or protocol parsers benefit from automated tests.
- Automate in CI: PlatformIO’s tests can be integrated with GitHub Actions or other CI systems, so your tests run automatically on each commit.
Conclusion
Testing isn’t just for web developers or big software teams. With PlatformIO, you can write and run unit tests for your embedded projects before flashing them to hardware, improving reliability and development speed.
By structuring your code well and embracing PlatformIO’s built-in framework, you bring modern software engineering practices into your Arduino, ESP32, or STM32 projects—making your code not just work, but work well.
- arduino
- platformio
- embedded-development
- unit-testing
- test-driven-development
- microcontrollers